I did my least favorite thing today - hang up clothes. I transferred both John and my's clothing from the bonus room, where they were laid out on the floor in all states of disarray, to the closet. Then I color-ordered mine. And donated a few. It took a long time and I'm tired of clothes. However, this is a HUGE weight off and our upstairs is a whole new place! Just in time, too, since we're painting the bonus room on Saturday.
I also hung up those Wordle pictures I framed for our new hampers, that we got at Target for $17 each. I think it will really help with organization in the bedroom and laundry room. There's a wedding photo we had in the apartment hanging above it.
I'm so glad I painted the closets white, too, because we'll never have to take down all that stuff to re-paint. Also, I'm glad we got the stackable floor closet system instead of the wall-mounted because we can take it with us if we ever move.
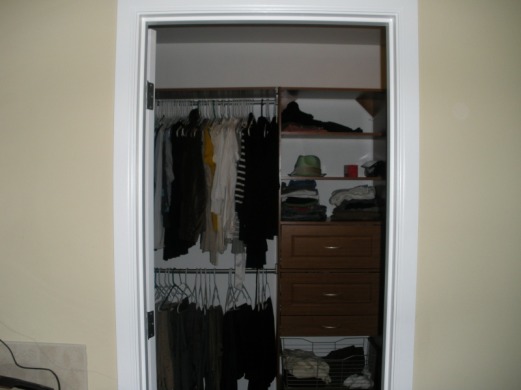 view from the bathroom looking at my side (the left side) of the closet 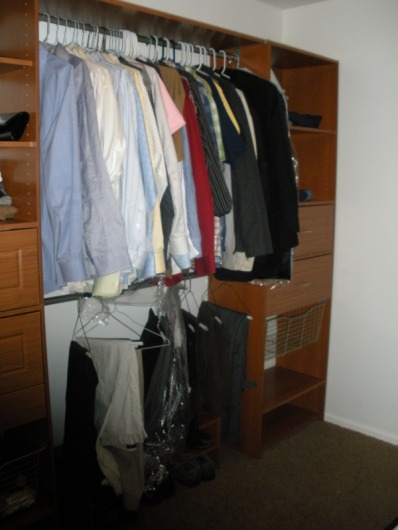 John's side. 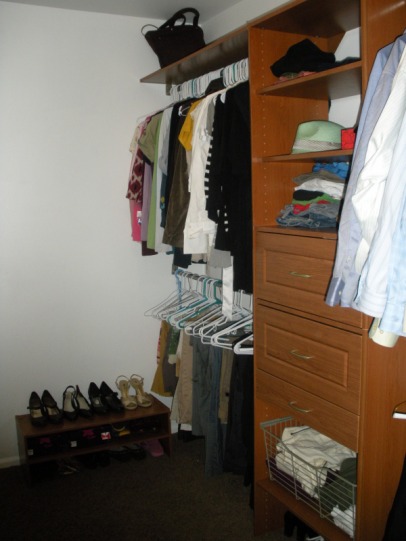 my side. I planned wrong so my jewelry drawer is on the bottom. Least I can see into it easily!  Color-order. 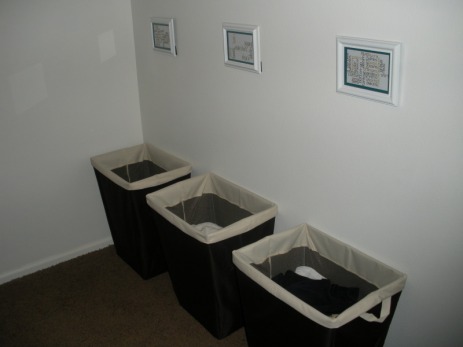 hamper organization system (fingers crossed it helps!) 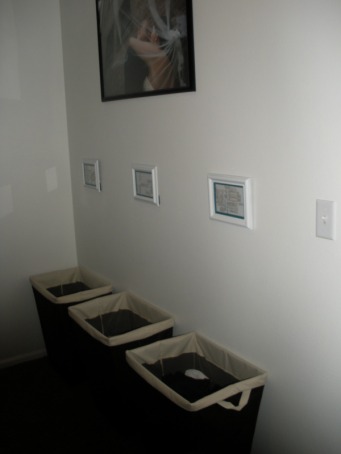 opposite wall of the shelves/rods
Here are a few before and after pictures of our bedroom. I am quite satisfied with the results, despite having to put 2 coats on. Of course, I would be happier with anything. No, it's really the perfect color. Much more airy. Now we just have to add in all the fixin's from my design board! Paint was recommended by Michelle at Second Street East. It's Benjamin Moore Horizon Gray but I got it matched in Glidden at Home Depot. 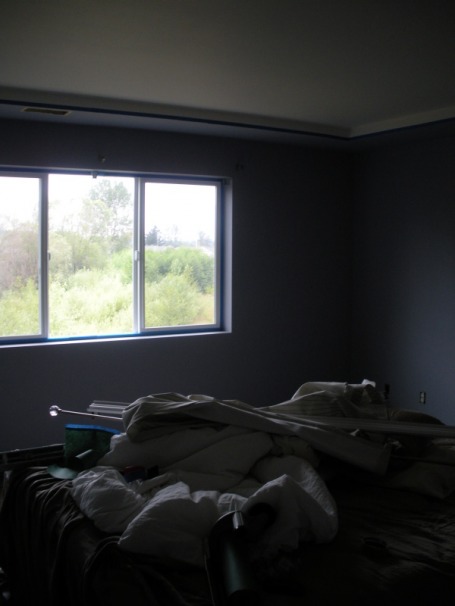 before: keepin it classy with the purple. Previous owners. And our mess of a bed. 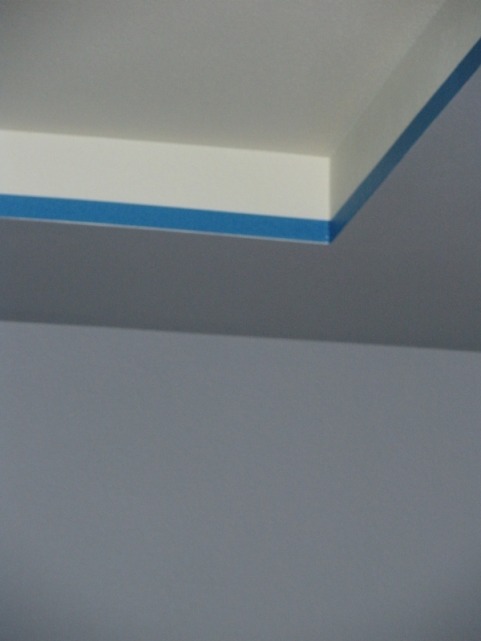 close-up of the purps. Taped off the tray ceiling and kept it white 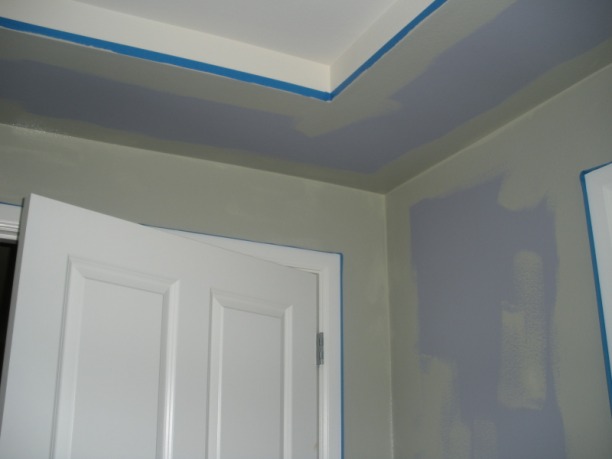 all trimmed out. Purple slowly disappearing... 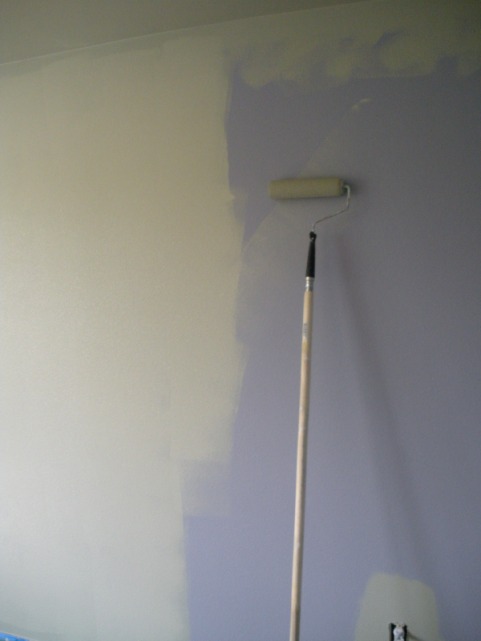 is it turning purple? no. say goodbye. 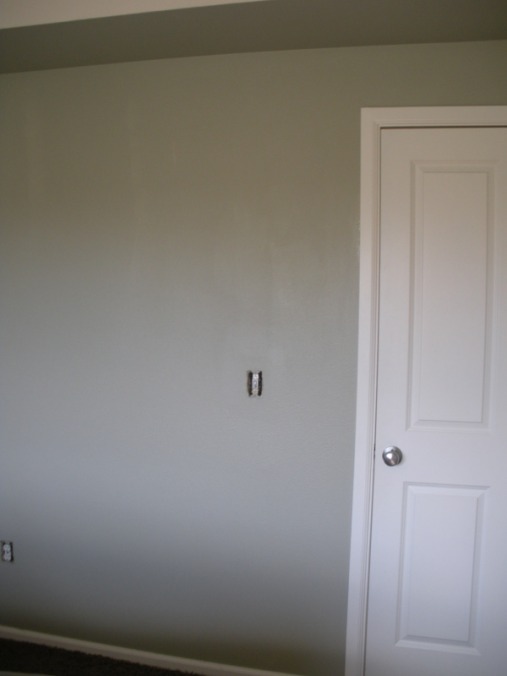 After: Shows the contrast with the white. Lighter than it looks. 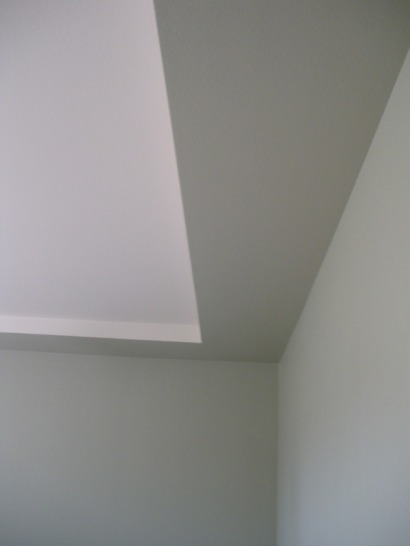 a little more accurate of a color.
I am mid-way through painting our master bedroom and covering up the bright periwinkle ways forever. Benjamin Moore Horizon Gray (matched by Glidden at HD) if you must know.
Things I have learned from my painting expedition:
- I need to keep chapstick on me at all times while painting because I tend to lick my lips and stick out my tongue while I paint - especially the ceiling.
- Blue tape is only partially protective from paint.
- I need to time myself as motivation to paint. Otherwise I do half a wall and take a break (like i am right now)
- Painting in booty shorts is the way to go - it's much easier to maneuver, and also easier to get wet paint off of legs than pants.
Well, back to painting. I'm thinking I'll get lunch after I put coat 1 on the biggest walls... Happy Painting!
I was hoping that I would have pictures of our closet to show you, but not yet. John successfully put up HIS side, and hung up most of his clothes. And then he mowed the lawn. So I am still without. Ha. Someday.
Today I am painting the guest bathroom and am considering trimming out the hallway... but we'll see. John is picking up a tester of the paint for our master bedroom, and I'd like to get that knocked out since it's just a rectangle, nothing crazy. Then we'll be almost done...
Current to do list:
- Paint hallway
- Paint Master Bed and Bath
- Paint Bonus Room
- Install towel bars for downstairs bath
- Curtains for dining room
- Shelves for dining room?
Get your mind out of the gutter, I'm talking about some rad new frames I got for those Wordles I made for our master closet - jeesh! Check out this small transformation these little guys made while I did some tidying up around the house:
 oooo you some ugly K-Mart frames.... $4 though! 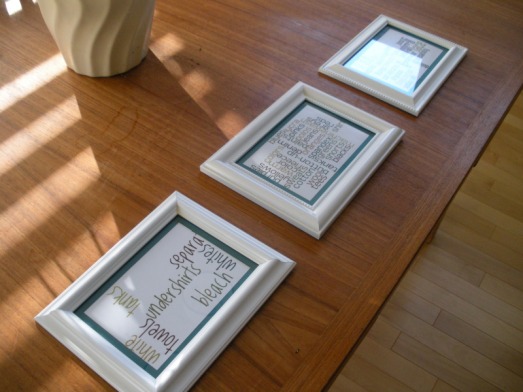 ta-da! 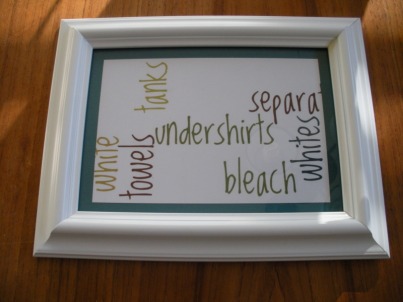 close-up 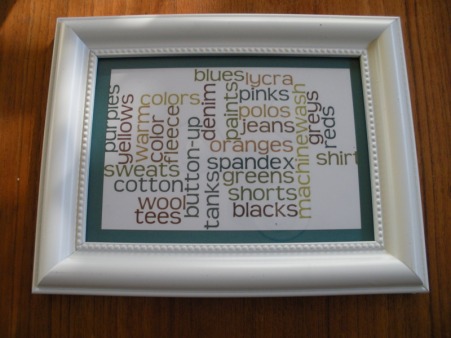 this one is my favorite 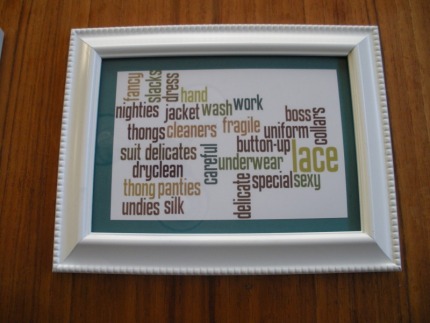 last one.  and this little cutey for the upstairs hallway Oh and I made this on Powerpoint (so sophisticated...) while watching Ellen. Just in case you're curious what our house is like. I hope to do an updated photo tour soon, too...
Of course I accidentally deleted all of the step-by-step photos I took... Anyway, you can read the instructions here, on the Little Green Notebook blog. I read about how to make Roman Shades by using a mini-blind skeleton (disassembling it, taking of all but a few slats, and putting it back together). I definitely did not want to paint today so I decided to try this out for fun. John was very resistant... but, he'll be happy because here is the price breakdown: 23"x42" Mini Blinds - Target, $2.50 1 yd fabric - JoAnn's, on sale $5.50 Total = $8Also bought fabric glue, which was $3, but that will continue to get used. It didn't turn out perfect and it probably doesn't look all that great from the outside, but what a FUN idea! 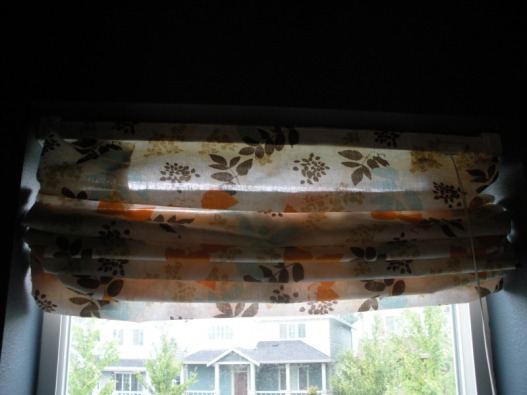 All pulled up (some of the fabric bunches up on the sides, but not too bad) 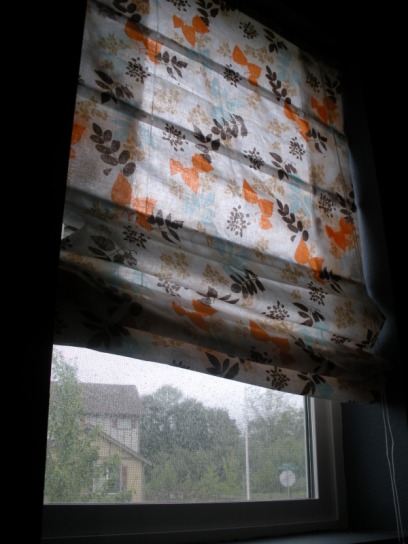 Voila! Very cute, and just enough privacy.
We'll see what the Hubs has to say when he gets home...
Our Living Room is basically done enough for now (like that?). However, our current TV stand does not fit in the room at all - it's way too small! One day we will catch up with technology and get a flat screen tv. And when that happens I plan on getting a credenza to put underneath it. The size is great (about 60-70", much more to scale) and the pieces I've come across are so unique - not to mention they're still wayyyy cheaper than an entertainment center or brand new sideboard. Here are some I am drooling over at Craigslist Seattle:
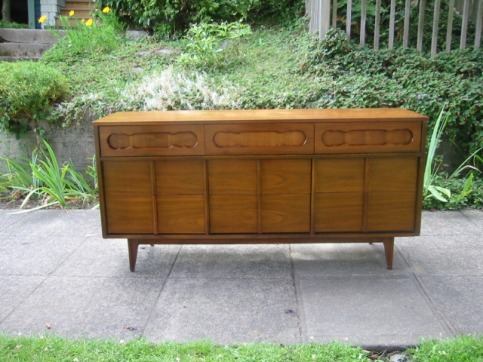 $350  $395 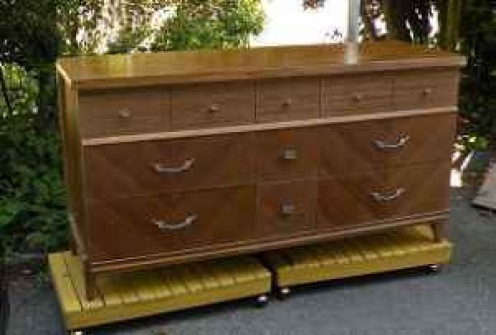 only $160! 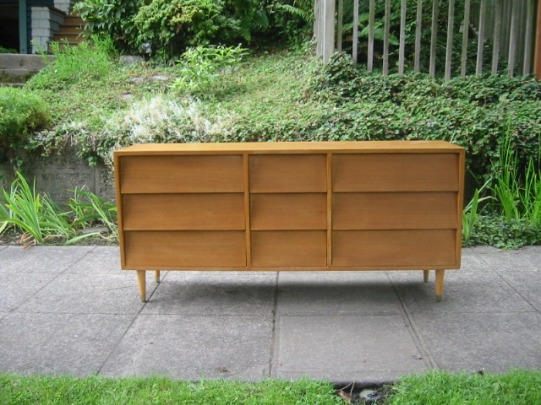 $295 - love the simple design, but so unique!  $650 - yowza! Click to see the storage though! Some of these I don't think I would even paint. Gorgeous.
I'm off to get some supplies for a surprise craft.... Thanks for reading!
Paint is all the rage in our house right now (read: "Summer Painting Extravaganze 2010"). So here is a mostly-picture post about just that.
Our Craft Room (turned Baby Room in the FAR future - so I don't have to repaint): 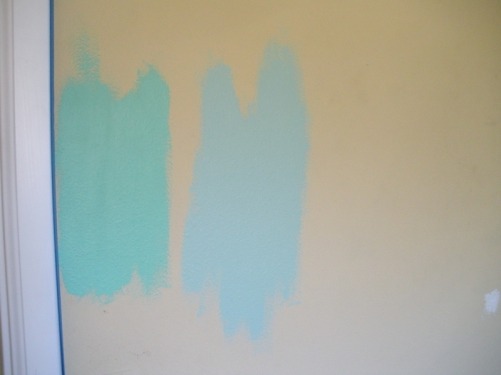 Can't remember the name of the left color, but too bright - went with Martha Stewart Sea Glass (right) 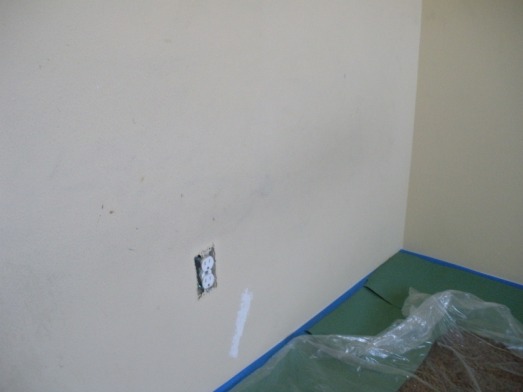 hard to see, but the walls are all blackened - gross!  trim done - using mostly the tester bottle! 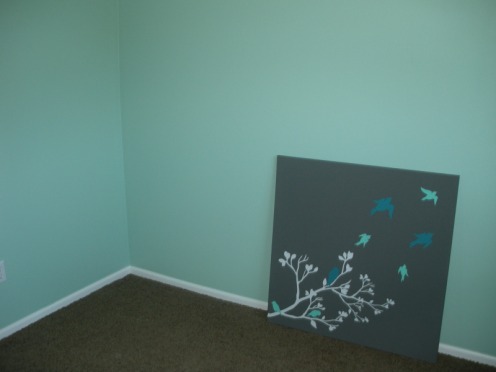 finished color - kind of bright at first, but good for a craft room. Can be used for a boy or girl baby room, too, so I'll never have to re-paint! Shown with canvas I made years ago
Here's my opinion on Paint Brands so far (keep in mind, I am still not willing to shell out $50 per gallon on Ben Moore or Sherwin Williams - I am convinced there is something more cost-effective.
Dutch Boy Refresh - DO NOT USE. Took me 3 gallons to do the guest room + closet. When I painted over places to cover spots, other spots were uncovered. STILL needs touch up but I refuse to do because that involves buying more of their product...
Behr - Satisfactory (used "Moon Shine" to paint closets white - no repainting necessary)
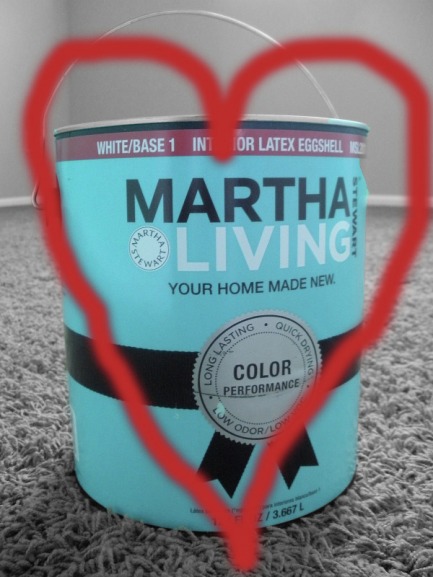
Martha Stewart (made by Glidden) - Recommended. Found at Home Depot. $25/gallon. Very reasonable price with GREAT coverage (I only trimmed once and had to do VERY little touch-up in the craft room). Since we used Glidden for our main color in the house (Olivewood), and I am happy with the quality, we will only be using Martha Stewart and Glidden from here on out.
 Oh Martha. You never cease to impress. I promise you my loyalty. I'm going to be painting our guest bath, laundry room, and bonus room upstairs all the same color. I want it to be an airy-neutral color to keep the upstairs from looking like a funhouse. These are the colors I have tested so far:
 L to R: MS Fossil, MS Sharkey Gray, Glidden Forest Khaki, Glidden Natural Wicker 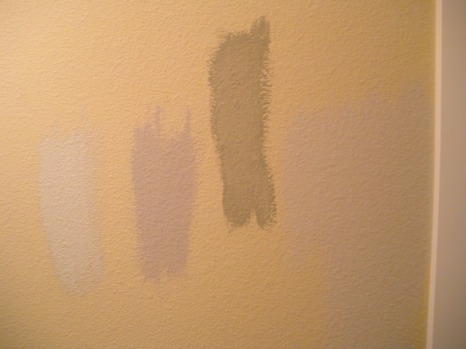 Bathroom with no natural light, L to R: MS Fossil, MS Sharkey Gray, Glidden Forest Khaki, Glidden Natural Wicker 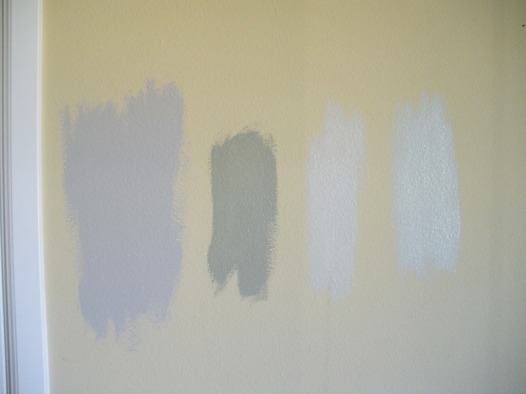 Bonus Room with natural light, L to R: MS Sharkey Gray, Glidden Forest Khaki, Glidden Natural Wicker, MS Fossil Sorry they're in a different order every time. What do you think?
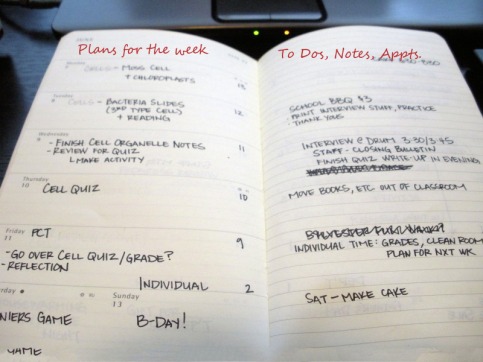
So, thanks to my former co-worker and awesome-in-general Beth, I have come across the perfect planners. These are very popular, so I'm probably not telling you anything new, but Moleskine planners are the best! I used a softcover 12-month one half-way through last year since I had been using a dumb $1 Teacher Planbook that had apples all over it. I didn't want to bring that to staff meetings. I also wanted something that I could keep in my purse and easily take with me so I could keep track of both professional and personal engagements. Like this: Well, I decided to treat myself to a new one to start off fresh at a new school. I got the Hardcover 18-month planner. It provides more room for notes, but has the same setup, and has an address section. There are also little folders in the back for extra stuff (I kept post-it notes). There is just no other planner out there that provides this layout. I LOVE having just 1 week at a time laid out with the perfect amount of space for each day. But! I love the notes page on the right even more.
 It's like Christmas...  Hello new friend... 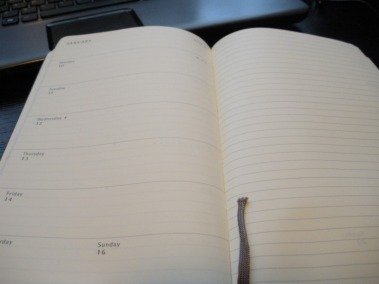 So crisp and clean 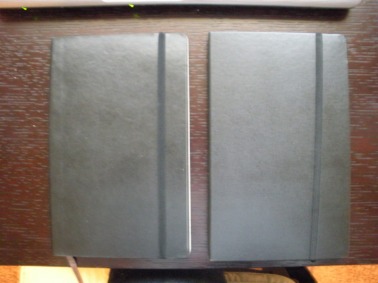 Old & Busted - - - New Hotness Did I mention it only took 2 days to arrive? Bonus. Check out their website for other styles and journals (like a recipe journal, wine journal, music journal!).
We're FINALLY putting a closet system into our master closet. Since our house was bank-owned, the previous owners removed a lot of stuff before they were evicted/left. One thing they took that I didn't grasp the gravity of was ALL wire shelving in every closet (except for 1). Lights, doors, faucets, outlets were all replaced per our agreement when we bought, but shelving wasn't. Who knew how much we needed shelves? We have a pantry, shelves in 1 office closet, and 1 entry closet shelf with a bar along it, which is great. However, all of our clothes have still been laid out in the bonus room. I painted the closet last week after spackling all the holes the previous shelves had left. John had been looking forward to planning out the closet, but he's been so busy that he finally let me have a go with it.
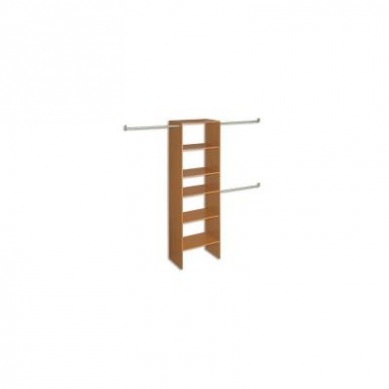
We're using the ClosetMaid Selectives system. Both for price and easy installation. They are not wall-mounted but free-standing. We plan on adding wall brackets for extra support, though. Our closet is about 12'x6' so we're adding one long system along the back wall and a few things to the side. We can always add more later.
We're getting a 5-10' starter kit, which has a 25" 6-shelf console in the middle. It also has 3 rods that I will adjust to 47". I'll add an extra rod to the side that only has one. This way, we each have 2 47" rods (one high, one low), which is great. I will get the center console and will be adding a small drawer for jewelry, 2 large drawers for me unmentionables, and perhaps a basket. The rest will be shelving. Then we will add 2 3-shelf add ons to the other side of the rods and that will be John's console, with the same fixin's. We will also be getting a few 31" shelves for shoes.
We will complete the closet with 3-4 stylish hampers to sort our laundry. Overall I'm very excited. My mom and I are leaving shortly (I need her cr-v, and companionship) and I hope that I can do most or all of the assembly myself. What a great day!
 Starter Kit 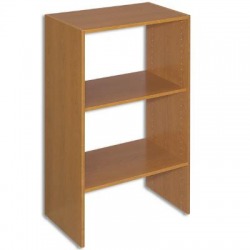 2 of these for John's side 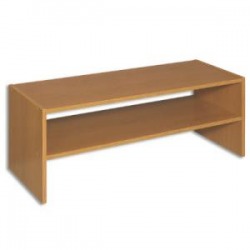 2 shoe racks 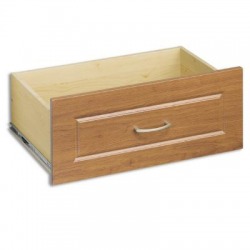 2 of these for each of us I'll let you know how it goes!
|
 RSS Feed